Table Of Contents
- Using Views
Previous topic
< ODM (Object-Document Mapper)
Next topic
This Page
Using Views
Views represent the user interface of your application. Views are often HTML files with embedded PHP code that perform tasks related solely to the presentation of the data. Views handle the job of providing data to the web browser or other tool that is used to make requests from your application.
Phalcon\Mvc\View and Phalcon\Mvc\View\Simple are responsible for the managing the view layer of your MVC application.
Integrating Views with Controllers
Phalcon automatically passes the execution to the view component as soon as a particular controller has completed its cycle. The view component will look in the views folder for a folder named as the same name of the last controller executed and then for a file named as the last action executed. For instance, if a request is made to the URL http://127.0.0.1/blog/posts/show/301, Phalcon will parse the URL as follows:
| Server Address | 127.0.0.1 |
| Phalcon Directory | blog |
| Controller | posts |
| Action | show |
| Parameter | 301 |
The dispatcher will look for a “PostsController” and its action “showAction”. A simple controller file for this example:
<?php

use Phalcon\Mvc\Controller;

class PostsController extends Controller
{
    public function indexAction()
    {

    }

    public function showAction($postId)
    {
        // Pass the $postId parameter to the view
        $this->view->postId = $postId;
    }
}
The setVar() method allows us to create view variables on demand so that they can be used in the view template. The example above demonstrates
how to pass the $postId parameter to the respective view template.
Hierarchical Rendering
Phalcon\Mvc\View supports a hierarchy of files and is the default component for view rendering in Phalcon. This hierarchy allows for common layout points (commonly used views), as well as controller named folders defining respective view templates.
This component uses by default PHP itself as the template engine, therefore views should have the .phtml extension. If the views directory is app/views then view component will find automatically for these 3 view files.
| Name | File | Description |
|---|---|---|
| Action View | app/views/posts/show.phtml | This is the view related to the action. It only will be shown when the “show” action was executed. |
| Controller Layout | app/views/layouts/posts.phtml | This is the view related to the controller. It only will be shown for every action executed within the controller “posts”. All the code implemented in the layout will be reused for all the actions in this controller. |
| Main Layout | app/views/index.phtml | This is main action it will be shown for every controller or action executed within the application. |
You are not required to implement all of the files mentioned above. Phalcon\Mvc\View will simply move to the next view level in the hierarchy of files. If all three view files are implemented, they will be processed as follows:
<!-- app/views/posts/show.phtml -->

<h3>This is show view!</h3>

<p>I have received the parameter <?php echo $postId; ?></p>
<!-- app/views/layouts/posts.phtml -->

<h2>This is the "posts" controller layout!</h2>

<?php echo $this->getContent(); ?>
<!-- app/views/index.phtml -->
<html>
    <head>
        <title>Example</title>
    </head>
    <body>

        <h1>This is main layout!</h1>

        <?php echo $this->getContent(); ?>

    </body>
</html>
Note the lines where the method $this->getContent() was called. This method instructs Phalcon\Mvc\View
on where to inject the contents of the previous view executed in the hierarchy. For the example above, the output will be:
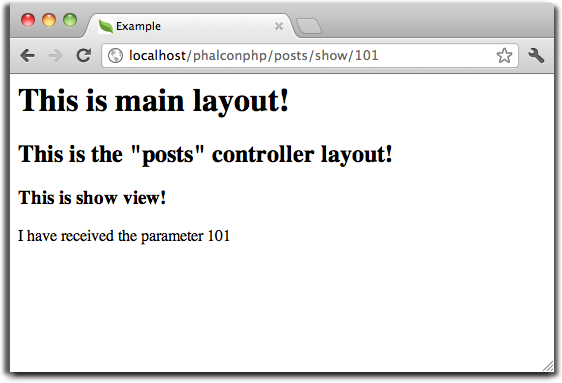
The generated HTML by the request will be:
<!-- app/views/index.phtml -->
<html>
    <head>
        <title>Example</title>
    </head>
    <body>

        <h1>This is main layout!</h1>

        <!-- app/views/layouts/posts.phtml -->

        <h2>This is the "posts" controller layout!</h2>

        <!-- app/views/posts/show.phtml -->

        <h3>This is show view!</h3>

        <p>I have received the parameter 101</p>

    </body>
</html>
Using Templates
Templates are views that can be used to share common view code. They act as controller layouts, so you need to place them in the layouts directory.
Templates can be rendered before the layout (using $this->view->setTemplateBefore()) or they can be rendered after the layout (using this->view->setTemplateAfter()). In the following example the template (layouts/common.phtml) is rendered after the main layout (layouts/posts.phtml):
<?php

use Phalcon\Mvc\Controller;

class PostsController extends Controller
{
    public function initialize()
    {
        $this->view->setTemplateAfter("common");
    }

    public function lastAction()
    {
        $this->flash->notice(
            "These are the latest posts"
        );
    }
}
<!-- app/views/index.phtml -->
<!DOCTYPE html>
<html>
    <head>
        <title>Blog's title</title>
    </head>
    <body>
        <?php echo $this->getContent(); ?>
    </body>
</html>
<!-- app/views/layouts/common.phtml -->

<ul class="menu">
    <li><a href="/">Home</a></li>
    <li><a href="/articles">Articles</a></li>
    <li><a href="/contact">Contact us</a></li>
</ul>

<div class="content"><?php echo $this->getContent(); ?></div>
<!-- app/views/layouts/posts.phtml -->

<h1>Blog Title</h1>

<?php echo $this->getContent(); ?>
<!-- app/views/posts/last.phtml -->

<article>
    <h2>This is a title</h2>
    <p>This is the post content</p>
</article>

<article>
    <h2>This is another title</h2>
    <p>This is another post content</p>
</article>
The final output will be the following:
<!-- app/views/index.phtml -->
<!DOCTYPE html>
<html>
    <head>
        <title>Blog's title</title>
    </head>
    <body>

        <!-- app/views/layouts/common.phtml -->

        <ul class="menu">
            <li><a href="/">Home</a></li>
            <li><a href="/articles">Articles</a></li>
            <li><a href="/contact">Contact us</a></li>
        </ul>

        <div class="content">

            <!-- app/views/layouts/posts.phtml -->

            <h1>Blog Title</h1>

            <!-- app/views/posts/last.phtml -->

            <article>
                <h2>This is a title</h2>
                <p>This is the post content</p>
            </article>

            <article>
                <h2>This is another title</h2>
                <p>This is another post content</p>
            </article>

        </div>

    </body>
</html>
If we had used $this->view->setTemplateBefore("common"), this would be the final output:
<!-- app/views/index.phtml -->
<!DOCTYPE html>
<html>
    <head>
        <title>Blog's title</title>
    </head>
    <body>

        <!-- app/views/layouts/posts.phtml -->

        <h1>Blog Title</h1>

        <!-- app/views/layouts/common.phtml -->

        <ul class="menu">
            <li><a href="/">Home</a></li>
            <li><a href="/articles">Articles</a></li>
            <li><a href="/contact">Contact us</a></li>
        </ul>

        <div class="content">

            <!-- app/views/posts/last.phtml -->

            <article>
                <h2>This is a title</h2>
                <p>This is the post content</p>
            </article>

            <article>
                <h2>This is another title</h2>
                <p>This is another post content</p>
            </article>

        </div>

    </body>
</html>
Control Rendering Levels
As seen above, Phalcon\Mvc\View supports a view hierarchy. You might need to control the level of rendering
produced by the view component. The method Phalcon\Mvc\View::setRenderLevel() offers this functionality.
This method can be invoked from the controller or from a superior view layer to interfere with the rendering process.
<?php

use Phalcon\Mvc\View;
use Phalcon\Mvc\Controller;

class PostsController extends Controller
{
    public function indexAction()
    {

    }

    public function findAction()
    {
        // This is an Ajax response so it doesn't generate any kind of view
        $this->view->setRenderLevel(
            View::LEVEL_NO_RENDER
        );

        // ...
    }

    public function showAction($postId)
    {
        // Shows only the view related to the action
        $this->view->setRenderLevel(
            View::LEVEL_ACTION_VIEW
        );
    }
}
The available render levels are:
| Class Constant | Description | Order |
|---|---|---|
| LEVEL_NO_RENDER | Indicates to avoid generating any kind of presentation. | |
| LEVEL_ACTION_VIEW | Generates the presentation to the view associated to the action. | 1 |
| LEVEL_BEFORE_TEMPLATE | Generates presentation templates prior to the controller layout. | 2 |
| LEVEL_LAYOUT | Generates the presentation to the controller layout. | 3 |
| LEVEL_AFTER_TEMPLATE | Generates the presentation to the templates after the controller layout. | 4 |
| LEVEL_MAIN_LAYOUT | Generates the presentation to the main layout. File views/index.phtml | 5 |
Disabling render levels
You can permanently or temporarily disable render levels. A level could be permanently disabled if it isn’t used at all in the whole application:
<?php

use Phalcon\Mvc\View;

$di->set(
    "view",
    function () {
        $view = new View();

        // Disable several levels
        $view->disableLevel(
            [
                View::LEVEL_LAYOUT      => true,
                View::LEVEL_MAIN_LAYOUT => true,
            ]
        );

        return $view;
    },
    true
);
Or disable temporarily in some part of the application:
<?php

use Phalcon\Mvc\View;
use Phalcon\Mvc\Controller;

class PostsController extends Controller
{
    public function indexAction()
    {

    }

    public function findAction()
    {
        $this->view->disableLevel(
            View::LEVEL_MAIN_LAYOUT
        );
    }
}
Picking Views
As mentioned above, when Phalcon\Mvc\View is managed by Phalcon\Mvc\Application
the view rendered is the one related with the last controller and action executed. You could override this by using the Phalcon\Mvc\View::pick() method:
<?php

use Phalcon\Mvc\Controller;

class ProductsController extends Controller
{
    public function listAction()
    {
        // Pick "views-dir/products/search" as view to render
        $this->view->pick("products/search");

        // Pick "views-dir/books/list" as view to render
        $this->view->pick(
            [
                "books",
            ]
        );

        // Pick "views-dir/products/search" as view to render
        $this->view->pick(
            [
                1 => "search",
            ]
        );
    }
}
Disabling the view
If your controller doesn’t produce any output in the view (or not even have one) you may disable the view component avoiding unnecessary processing:
<?php

use Phalcon\Mvc\Controller;

class UsersController extends Controller
{
    public function closeSessionAction()
    {
        // Close session
        // ...

        // Disable the view to avoid rendering
        $this->view->disable();
    }
}
Alternatively, you can return false to produce the same effect:
<?php

use Phalcon\Mvc\Controller;

class UsersController extends Controller
{
    public function closeSessionAction()
    {
        // ...

        // Disable the view to avoid rendering
        return false;
    }
}
You can return a ‘response’ object to avoid disable the view manually:
<?php

use Phalcon\Mvc\Controller;

class UsersController extends Controller
{
    public function closeSessionAction()
    {
        // Close session
        // ...

        // A HTTP Redirect
        return $this->response->redirect("index/index");
    }
}
Simple Rendering
Phalcon\Mvc\View\Simple is an alternative component to Phalcon\Mvc\View. It keeps most of the philosophy of Phalcon\Mvc\View but lacks of a hierarchy of files which is, in fact, the main feature of its counterpart.
This component allows the developer to have control of when a view is rendered and its location. In addition, this component can leverage of view inheritance available in template engines such as Volt and others.
The default component must be replaced in the service container:
<?php

use Phalcon\Mvc\View\Simple as SimpleView;

$di->set(
    "view",
    function () {
        $view = new SimpleView();

        $view->setViewsDir("../app/views/");

        return $view;
    },
    true
);
Automatic rendering must be disabled in Phalcon\Mvc\Application (if needed):
<?php

use Exception;
use Phalcon\Mvc\Application;

try {
    $application = new Application($di);

    $application->useImplicitView(false);

    $response = $application->handle();

    $response->send();
} catch (Exception $e) {
    echo $e->getMessage();
}
To render a view it’s necessary to call the render method explicitly indicating the relative path to the view you want to display:
<?php

use Phalcon\Mvc\Controller;

class PostsController extends \Controller
{
    public function indexAction()
    {
        // Render 'views-dir/index.phtml'
        echo $this->view->render("index");

        // Render 'views-dir/posts/show.phtml'
        echo $this->view->render("posts/show");

        // Render 'views-dir/index.phtml' passing variables
        echo $this->view->render(
            "index",
            [
                "posts" => Posts::find(),
            ]
        );

        // Render 'views-dir/posts/show.phtml' passing variables
        echo $this->view->render(
            "posts/show",
            [
                "posts" => Posts::find(),
            ]
        );
    }
}
This is different to Phalcon\Mvc\View who’s render() method uses controllers and actions as parameters:
<?php

$params = [
    "posts" => Posts::find(),
];

// Phalcon\Mvc\View
$view = new \Phalcon\Mvc\View();
echo $view->render("posts", "show", $params);

// Phalcon\Mvc\View\Simple
$simpleView = new \Phalcon\Mvc\View\Simple();
echo $simpleView->render("posts/show", $params);
Using Partials
Partial templates are another way of breaking the rendering process into simpler more manageable chunks that can be reused by different parts of the application. With a partial, you can move the code for rendering a particular piece of a response to its own file.
One way to use partials is to treat them as the equivalent of subroutines: as a way to move details out of a view so that your code can be more easily understood. For example, you might have a view that looks like this:
<div class="top"><?php $this->partial("shared/ad_banner"); ?></div>

<div class="content">
    <h1>Robots</h1>

    <p>Check out our specials for robots:</p>
    ...
</div>

<div class="footer"><?php $this->partial("shared/footer"); ?></div>
The partial() method does accept a second parameter as an array of variables/parameters that only will exists in the scope of the partial:
<?php $this->partial("shared/ad_banner", ["id" => $site->id, "size" => "big"]); ?>
Transfer values from the controller to views
Phalcon\Mvc\View is available in each controller using the view variable ($this->view). You can
use that object to set variables directly to the view from a controller action by using the setVar() method.
<?php

use Phalcon\Mvc\Controller;

class PostsController extends Controller
{
    public function indexAction()
    {

    }

    public function showAction()
    {
        $user  = Users::findFirst();
        $posts = $user->getPosts();

        // Pass all the username and the posts to the views
        $this->view->setVar("username", $user->username);
        $this->view->setVar("posts",    $posts;

        // Using the magic setter
        $this->view->username = $user->username;
        $this->view->posts    = $posts;

        // Passing more than one variable at the same time
        $this->view->setVars(
            [
                "username" => $user->username,
                "posts"    => $posts,
            ]
        );
    }
}
A variable with the name of the first parameter of setVar() will be created in the view, ready to be used. The variable can be of any type,
from a simple string, integer etc. variable to a more complex structure such as array, collection etc.
<h1>
    {{ username }}'s Posts
</h1>

<div class="post">
<?php

    foreach ($posts as $post) {
        echo "<h2>", $post->title, "</h2>";
    }

?>
</div>
Caching View Fragments
Sometimes when you develop dynamic websites and some areas of them are not updated very often, the output is exactly the same between requests. Phalcon\Mvc\View offers caching a part or the whole rendered output to increase performance.
Phalcon\Mvc\View integrates with Phalcon\Cache to provide an easier way to cache output fragments. You could manually set the cache handler or set a global handler:
<?php

use Phalcon\Mvc\Controller;

class PostsController extends Controller
{
    public function showAction()
    {
        // Cache the view using the default settings
        $this->view->cache(true);
    }

    public function showArticleAction()
    {
        // Cache this view for 1 hour
        $this->view->cache(
            [
                "lifetime" => 3600,
            ]
        );
    }

    public function resumeAction()
    {
        // Cache this view for 1 day with the key "resume-cache"
        $this->view->cache(
            [
                "lifetime" => 86400,
                "key"      => "resume-cache",
            ]
        );
    }

    public function downloadAction()
    {
        // Passing a custom service
        $this->view->cache(
            [
                "service"  => "myCache",
                "lifetime" => 86400,
                "key"      => "resume-cache",
            ]
        );
    }
}
When we do not define a key to the cache, the component automatically creates one using an MD5 hash of the name of the controller and view currently being rendered in the format of “controller/view”. It is a good practice to define a key for each action so you can easily identify the cache associated with each view.
When the View component needs to cache something it will request a cache service from the services container. The service name convention for this service is “viewCache”:
<?php

use Phalcon\Cache\Frontend\Output as OutputFrontend;
use Phalcon\Cache\Backend\Memcache as MemcacheBackend;

// Set the views cache service
$di->set(
    "viewCache",
    function () {
        // Cache data for one day by default
        $frontCache = new OutputFrontend(
            [
                "lifetime" => 86400,
            ]
        );

        // Memcached connection settings
        $cache = new MemcacheBackend(
            $frontCache,
            [
                "host" => "localhost",
                "port" => "11211",
            ]
        );

        return $cache;
    }
);
The frontend must always be Phalcon\Cache\Frontend\Output and the service ‘viewCache’ must be registered as always open (not shared) in the services container (DI).
When using views, caching can be used to prevent controllers from needing to generate view data on each request.
To achieve this we must identify uniquely each cache with a key. First we verify that the cache does not exist or has expired to make the calculations/queries to display data in the view:
<?php

use Phalcon\Mvc\Controller;

class DownloadController extends Controller
{
    public function indexAction()
    {
        // Check whether the cache with key "downloads" exists or has expired
        if ($this->view->getCache()->exists("downloads")) {
            // Query the latest downloads
            $latest = Downloads::find(
                [
                    "order" => "created_at DESC",
                ]
            );

            $this->view->latest = $latest;
        }

        // Enable the cache with the same key "downloads"
        $this->view->cache(
            [
                "key" => "downloads",
            ]
        );
    }
}
The PHP alternative site is an example of implementing the caching of fragments.
Template Engines
Template Engines help designers to create views without the use of a complicated syntax. Phalcon includes a powerful and fast templating engine called Volt.
Additionally, Phalcon\Mvc\View allows you to use other template engines instead of plain PHP or Volt.
Using a different template engine, usually requires complex text parsing using external PHP libraries in order to generate the final output for the user. This usually increases the number of resources that your application will use.
If an external template engine is used, Phalcon\Mvc\View provides exactly the same view hierarchy and it’s still possible to access the API inside these templates with a little more effort.
This component uses adapters, these help Phalcon to speak with those external template engines in a unified way, let’s see how to do that integration.
Creating your own Template Engine Adapter
There are many template engines, which you might want to integrate or create one of your own. The first step to start using an external template engine is create an adapter for it.
A template engine adapter is a class that acts as bridge between Phalcon\Mvc\View and the template engine itself.
Usually it only needs two methods implemented: __construct() and render(). The first one receives the Phalcon\Mvc\View
instance that creates the engine adapter and the DI container used by the application.
The method render() accepts an absolute path to the view file and the view parameters set using $this->view->setVar(). You could read or require it
when it’s necessary.
<?php

use Phalcon\DiInterface;
use Phalcon\Mvc\Engine;

class MyTemplateAdapter extends Engine
{
    /**
     * Adapter constructor
     *
     * @param \Phalcon\Mvc\View $view
     * @param \Phalcon\Di $di
     */
    public function __construct($view, DiInterface $di)
    {
        // Initialize here the adapter
        parent::__construct($view, $di);
    }

    /**
     * Renders a view using the template engine
     *
     * @param string $path
     * @param array $params
     */
    public function render($path, $params)
    {
        // Access view
        $view = $this->_view;

        // Access options
        $options = $this->_options;

        // Render the view
        // ...
    }
}
Changing the Template Engine
You can replace the template engine completely or use more than one template engine at the same time. The method Phalcon\Mvc\View::registerEngines()
accepts an array containing data that define the template engines. The key of each engine is an extension that aids in distinguishing one from another.
Template files related to the particular engine must have those extensions.
The order that the template engines are defined with Phalcon\Mvc\View::registerEngines() defines the relevance of execution. If
Phalcon\Mvc\View finds two views with the same name but different extensions, it will only render the first one.
If you want to register a template engine or a set of them for each request in the application. You could register it when the view service is created:
<?php

use Phalcon\Mvc\View;

// Setting up the view component
$di->set(
    "view",
    function () {
        $view = new View();

        // A trailing directory separator is required
        $view->setViewsDir("../app/views/");

        // Set the engine
        $view->registerEngines(
            [
                ".my-html" => "MyTemplateAdapter",
            ]
        );

        // Using more than one template engine
        $view->registerEngines(
            [
                ".my-html" => "MyTemplateAdapter",
                ".phtml"   => "Phalcon\\Mvc\\View\\Engine\\Php",
            ]
        );

        return $view;
    },
    true
);
There are adapters available for several template engines on the Phalcon Incubator
Injecting services in View
Every view executed is included inside a Phalcon\Di\Injectable instance, providing easy access to the application’s service container.
The following example shows how to write a jQuery ajax request using a URL with the framework conventions. The service “url” (usually Phalcon\Mvc\Url) is injected in the view by accessing a property with the same name:
<script type="text/javascript">

$.ajax({
    url: "<?php echo $this->url->get("cities/get"); ?>"
})
.done(function () {
    alert("Done!");
});

</script>
Stand-Alone Component
All the components in Phalcon can be used as glue components individually because they are loosely coupled to each other:
Hierarchical Rendering
Using Phalcon\Mvc\View in a stand-alone mode can be demonstrated below:
<?php

use Phalcon\Mvc\View;

$view = new View();

// A trailing directory separator is required
$view->setViewsDir("../app/views/");

// Passing variables to the views, these will be created as local variables
$view->setVar("someProducts",       $products);
$view->setVar("someFeatureEnabled", true);

// Start the output buffering
$view->start();

// Render all the view hierarchy related to the view products/list.phtml
$view->render("products", "list");

// Finish the output buffering
$view->finish();

echo $view->getContent();
A short syntax is also available:
<?php

use Phalcon\Mvc\View;

$view = new View();

echo $view->getRender(
    "products",
    "list",
    [
        "someProducts"       => $products,
        "someFeatureEnabled" => true,
    ],
    function ($view) {
        // Set any extra options here

        $view->setViewsDir("../app/views/");

        $view->setRenderLevel(
            View::LEVEL_LAYOUT
        );
    }
);
Simple Rendering
Using Phalcon\Mvc\View\Simple in a stand-alone mode can be demonstrated below:
<?php

use Phalcon\Mvc\View\Simple as SimpleView;

$view = new SimpleView();

// A trailing directory separator is required
$view->setViewsDir("../app/views/");

// Render a view and return its contents as a string
echo $view->render("templates/welcomeMail");

// Render a view passing parameters
echo $view->render(
    "templates/welcomeMail",
    [
        "email"   => $email,
        "content" => $content,
    ]
);
View Events
Phalcon\Mvc\View and Phalcon\Mvc\View\Simple are able to send events to an EventsManager if it is present. Events are triggered using the type “view”. Some events when returning boolean false could stop the active operation. The following events are supported:
| Nom d’évt | Triggered | Opération stoppée ? |
|---|---|---|
| beforeRender | Triggered before starting the render process | Oui |
| beforeRenderView | Triggered before rendering an existing view | Oui |
| afterRenderView | Triggered after rendering an existing view | Non |
| afterRender | Triggered after completing the render process | Non |
| notFoundView | Triggered when a view was not found | Non |
The following example demonstrates how to attach listeners to this component:
<?php

use Phalcon\Events\Event;
use Phalcon\Events\Manager as EventsManager;
use Phalcon\Mvc\View;

$di->set(
    "view",
    function () {
        // Create an events manager
        $eventsManager = new EventsManager();

        // Attach a listener for type "view"
        $eventsManager->attach(
            "view",
            function (Event $event, $view) {
                echo $event->getType(), " - ", $view->getActiveRenderPath(), PHP_EOL;
            }
        );

        $view = new View();

        $view->setViewsDir("../app/views/");

        // Bind the eventsManager to the view component
        $view->setEventsManager($eventsManager);

        return $view;
    },
    true
);
The following example shows how to create a plugin that clean/repair the HTML produced by the render process using Tidy:
<?php

use Phalcon\Events\Event;

class TidyPlugin
{
    public function afterRender(Event $event, $view)
    {
        $tidyConfig = [
            "clean"          => true,
            "output-xhtml"   => true,
            "show-body-only" => true,
            "wrap"           => 0,
        ];

        $tidy = tidy_parse_string(
            $view->getContent(),
            $tidyConfig,
            "UTF8"
        );

        $tidy->cleanRepair();

        $view->setContent(
            (string) $tidy
        );
    }
}

// Attach the plugin as a listener
$eventsManager->attach(
    "view:afterRender",
    new TidyPlugin()
);